How To Make Your Own Leather Dog Collar (Video)

Dogs are just the best. They’re cute, drooly, and have funny names. They’re excited to see you every time you walk in the door, even if you left one minute ago to bring in the next bag of groceries. I mean, look at this face...

Show your pup some love and make a leather collar, just for them! This collar is simple and makes for a great beginner leather project. This is also a great DIY project for kids.
This craft can be done in under an hour and teach you some great basics to leatherworking. Let’s get this project started.
Here are the supplies you will need:
¼ ‘‘ Rapid Rivets (may need longer is using a thick leather)
Leather Hole Punch (Rotary or Set)

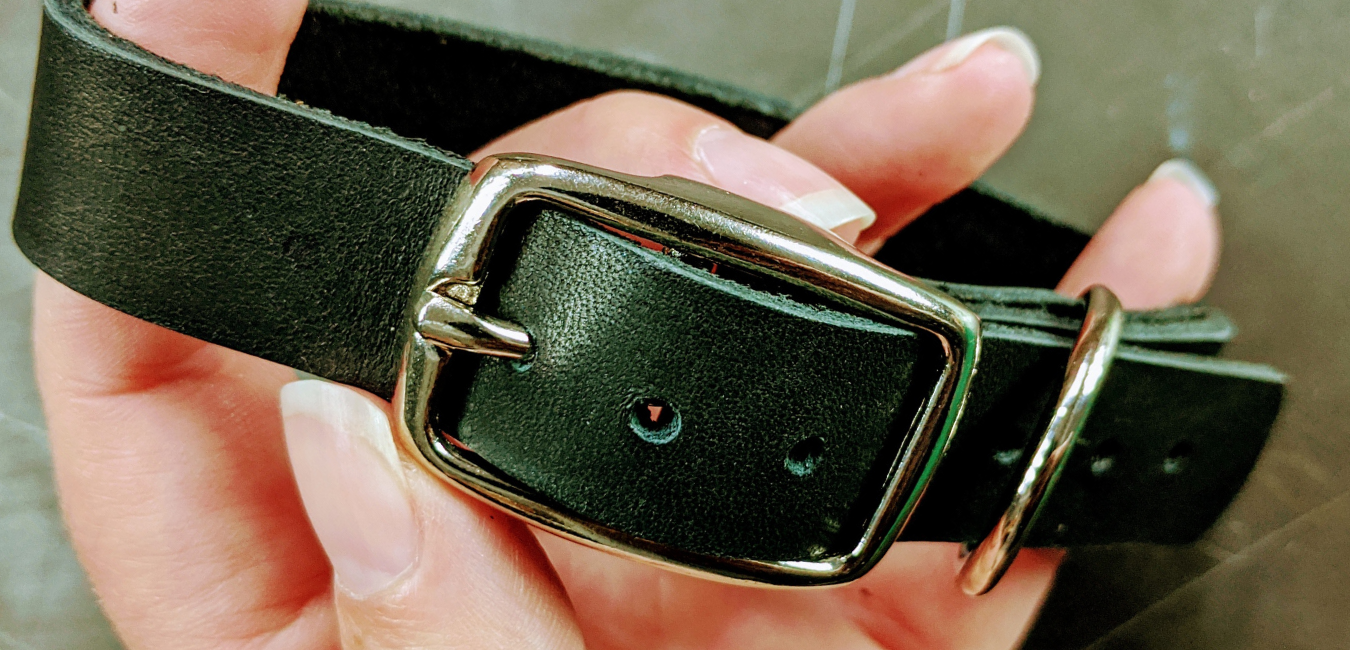
First, you will want to run your strap through your buckle to figure out your dee ring and rivet placement. I pulled through about two inches of leather to accommodate all the hardware.
Pull the other end of the strap through your dee ring, slide it up by the buckle, and sandwich it between your straps.

Place your rivets where you would like to set them, on either side of the ring. The rivets will not only be securing your buckle, but also holding the ring in place to attach a leash when needed. When you are happy with their placement, mark your rivet locations with a pencil or marker.

Remove the dee ring, set the rivets aside, and unfold your piece of leather. Take your hole punch and make the holes for your two rivets. Once those are punched through, fold the leather back over and mark the holes on the backside of the strap. Use your punch to make those holes, and you should have perfectly lined up holes to put your rivets though!

Insert the rivet nearest the buckle first. Set it with the rivet setter. Slide the dee ring back up, and again, sandwich it between the leather. Once it is in place, insert your second rivet and set it.
Now that you have your buckle and ring set and in place, you’ll want to figure out how long your collar should be. Use your dog for reference, or an old collar that you know fits. Trim the strap to the appropriate length.

Now we are going to punch out the buckle notches so you can buckle up the collar.
I like making a paper template when I need to line up hole punches. It ensures you get them lined up as near as perfect as possible. Simply cut a scrap piece of paper the same width as your strap, mark a line down the center, and set your dots ½” away from one another. Set your notches in from the end of the strap between 1-2”.
I used a clip to hold my template on top of my strap, but you could use a low tack tape if you prefer. Once it was centered, I took my leather punch and made all the notches right on their mark.

Once all your holes are punched, your collar is essentially done. Now you can make some cosmetic choices.
I rounded the end of the collar because I liked the look of the softer edge. It looked nice with the squared edge as well, but this was just a preference for me.
Depending on the leather you used, you could stamp your dog’s name or paint some fun shapes and colors on the collar. If you want your doggo to have a tough guy image, you could add some studs or spikes. Do a combination of bright colors and studs. It’s a DIY leather project, so the end result is up to you!

We love to see finished projects (and dogs!!) so when you finish this project, be sure to tag us on social media with #theleatherguymn so we can see your handy work! Check out our shop pup Smokey, looking very dapper in his new collar!
Thanks so much for visiting!

