How To Make Your Own Leather Drink Holster (Free Template)

Summer is coming and we will all be spending more time outdoors! If you are looking for DIY leathercraft to help keep your hands free while at a cookout, tailgating before a game, or at the Renn Faire, this leather holster will keep your beer or soda on your person and out of the way!
Supplies Needed:
12x12 (or larger) Sheet of Leather
Knife
Optional: Snaps and Setter
Or get a Kit with everything you need here.

Start with printing and cutting out the template for your holster. A thicker cardstock or old file folder works great here and holds up to a number of uses! We have a free drink holster template for you to download and use. Take your leather and lay it out flat. If the leather curls or is wrinkled from storage, be sure to flatten or smooth it first. You can do this with heavy items or by ironing it with a common household clothes iron.

Lay the templates on top of your leather and trace them out with a pen or chalk. If using a pen, make your marks on the flesh side of the leather to ensure you don’t accidentally mark up the finished side.
Use your preferred knife to cut every piece as cleanly as possible. I was able to fit this project in a single 12x12 pre-cut, but you could cut this out of scrap you have laying around as well!

Once all your pieces are cut, take your template and your awl and mark where you will need to punch your holes for your hardware.
If you decide to make this out of Vegetable Tanned Leather, this would be a good time to tool, dye, or paint your pieces before assembling your drink holster.
When you have all the hardware holes punched, it’s time to start setting your hardware. I would suggest setting the bottom cross strap to the center strap of the holster first. With the side rivets set, the strap will bow and be much harder to set hardware into.

Set your side rivets through the center strap and back of the holster. Fold-down the top of your holster to create your belt loop. Here is where you can decide whether to set the belt loop with a rivet or a snap.
If you set the loop with a rivet, you will have to undo your belt each time you want to remove your holster. A snap will allow you to remove the holster quickly! To keep it simple, I went with a rivet so that I only used one type of hardware for the entirety of the project.

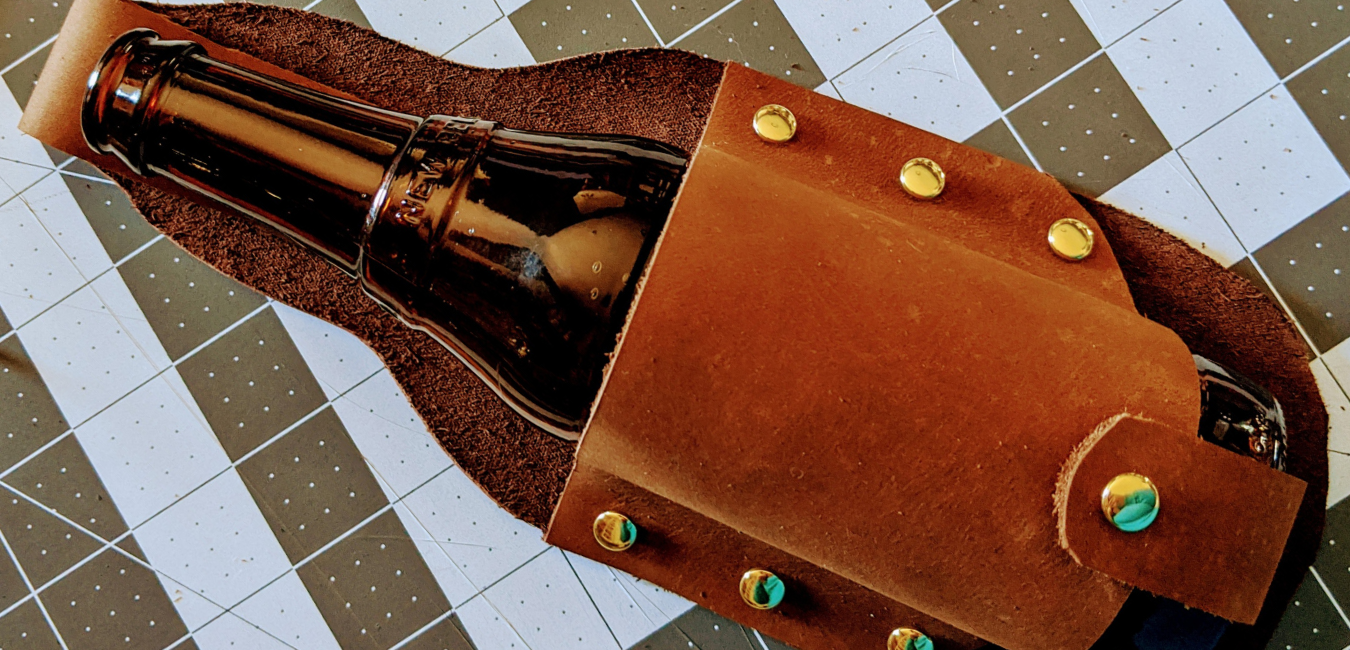
When you finish setting the hardware, you have a finished beer holster!
Take it a step further and clean up your piece by trimming any rough edges from uneven cuts. If you’d like, you can now apply Gum tragacanth or Edge Kote to finish your edges and give them a glossy look.
This simple and durable holster will hold up for years to come with proper care! It makes for a great gift for the beer or soda enthusiast in your life. It holds both standard-sized glass bottles and cans snugly and securely.
As always, this craft can be as simple or complex as you would like.
If you’re comfortable with hand stitching leather, sew all the pieces together instead of using hardware. Trim off the belt loop and add a proper holster clip instead.
Add a leather lace or strap to the bottom of the holster to tie around your thigh for extra security. Line the holster with a fun printed leather to really make it stand out.
How will you customize it?
If you make this project, share it with us on Social Media by tagging us with #theleatherguymn. We love to see your finished projects and may even share them with our other followers! Thanks for joining us for another blog, we’re happy to have you here!

