

How To Make Your Own Leather Bookmark

Making a leather bookmark is a simple and fun DIY project, perfect for someone just starting out with leatherworking. These are a great rainy day project and would make for some truly unique gift tags, stocking stuffers, or teacher gifts.
Dye, paint, stamp, or carve the leather. Make it as simple or complex as you like! There’s no right or wrong here. This can be a fun craft for kids or an advanced project to try out your leather tooling skills on a smaller scale.
Pick up some scrap and cut your own size and shape. Or, we have a DIY Kit ready to go with the basics you need to paint and tassel your bookmark (link coming soon)!
Should you decide that you want to dye and/or stamp or carve your bookmark, you will want to be sure to use Veg Tan leather. Paint, however, can be applied to just about any other leather we have!
You will also want to keep temper in mind! If you want your bookmark to be stiff and sturdy, use a semi-stiff to stiff temper. If you don’t mind it being a little more fabric like (soft, a bit floppy) you can use softer temper leather. In the video above, we are using a fairly thick veg tan, with a stiff temper.
If you decide to use Oil-Tanned leather, you will want to be sure to use a sealant (such as Bag Kote or Resolene) since the oil that is found in the leather can stain book pages if left between them for an extended time.
The items used in this video are:
- Veg Tan Scrap 6-8 oz (Pre-Cuts are a great option for this as well)
- Ruler
- Cutting Mat
- Fiebings Dye (Optional)
- Leather Lace (You could also use a ribbon of your choosing)
There are 5 basic steps to create your own bookmark.
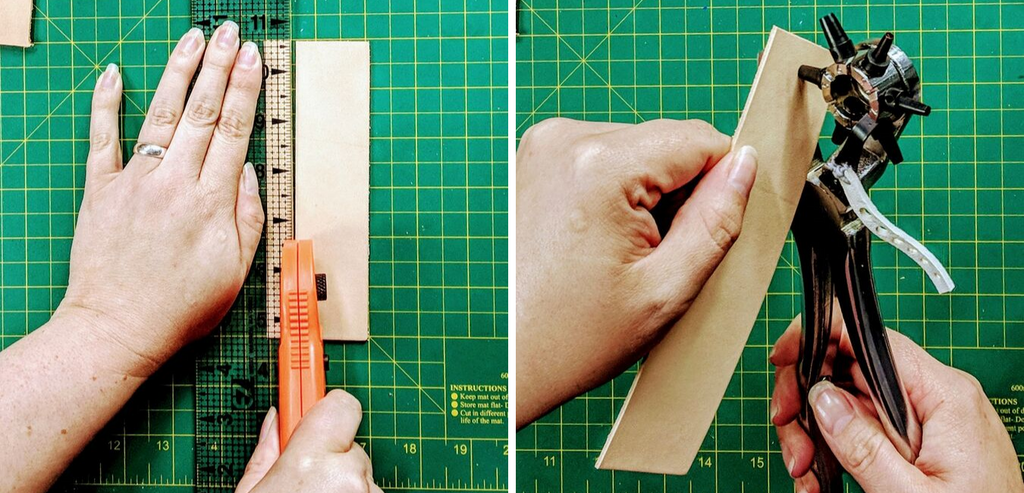
1. Cut your bookmark shape out of your scrap or pre-cut piece of leather with a ruler and rotary cutter. These shapes we are working with are 1.5” x 8”.
2. Use the leather punch to create a hole to run your tassel through. You’ll want to do this early in the process so you can work around the hole with your designs.
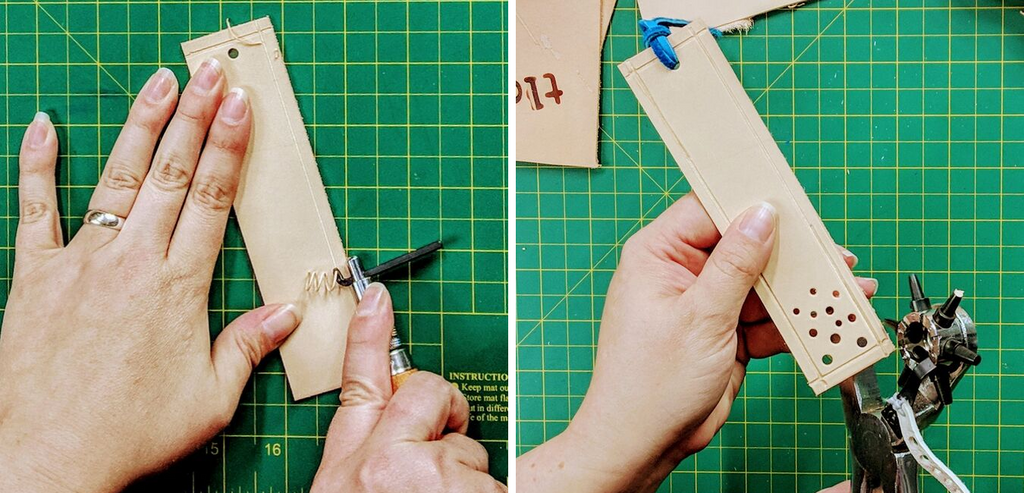
3. If you want to create the carved edge seen in our example, use the stitching groover. Set the tool to the width from the edge you would prefer. This tool is typically used to create a straight groove for hand stitching. If you feel so inclined, you could even decorate the edges with some interesting stitching!
4. Decorate your bookmark! Paint it, stamp it, use your hole punches to create interesting patterns. Make sure to allow your bookmarks time to dry should you decide to paint or dye them.

5. Once you’re done decorating your bookmark, you’ll want to add your tassel. Take your leather lace or ribbon, fold it in half in the shape of a “U” to create a loop. Push the loop through the hole. Then pull your two loose ends through the loop to knot it off over the top of the bookmark.
And with that, you should have a finished leather bookmark!
Not sure how to decorate your bookmark?
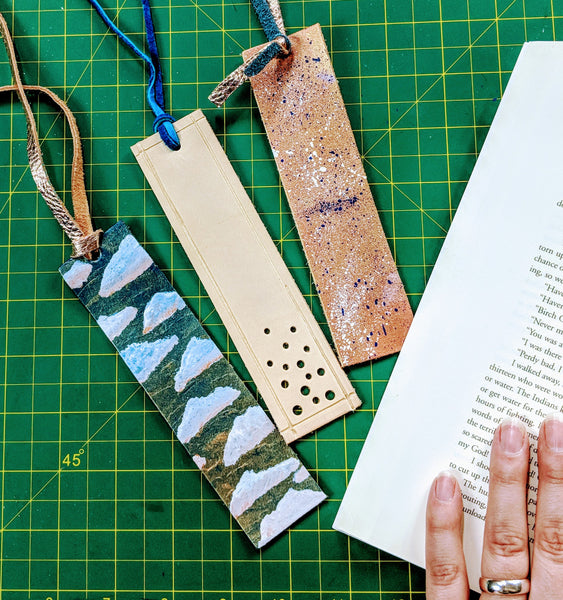
-Stamp your favorite book quote.
-Paint a miniature version of your favorite book’s cover.
-Geometric designs. Use your ruler to create crisp lines.
-Add stitching or hardware to edges and corners.
-Glue a fun fabric onto the back of the leather.
Did you make this project? We would love to see it! Share it with us on Facebook or Instagram. Tag us with @theleatherguymn